
hey everyone, i’m kim from notcrazyunwell.com and am happy to guest post for san, while she’s hopefully enjoying every minute of her family’s visit!
i promised a little while ago on my blog to post a DIY about how i made jam and figured it’d be a nice thing to share with san’s readers as well. it’s easy-breezy (seriously, don’t be scared. if i can do it, you can do it!) and i can’t believe i haven’t tried it before. i don’t think i’ll be buying jam at the store any time soon … also, i think a glass of homemade jam makes a great little gift.
so, here it goes:
the first thing would actually be to prepare the glasses. i placed the lids in a small pot with hot water on the stove to sterilize them. let the water get to an almost-boil and then turn off the stove. you can just leave the lids in the water until right before you want to fill the jam into the glasses. i also washed the glasses with really hot water before putting them into a small baking pan.
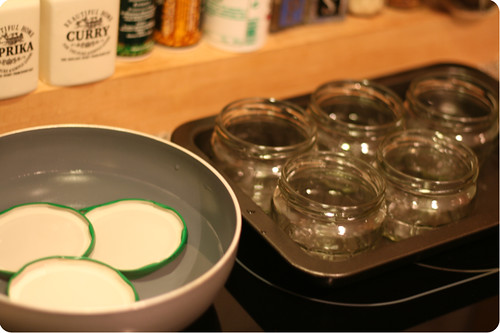
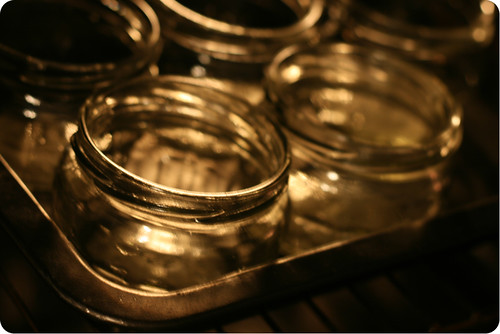
i then set the oven to 50-80 degrees C (about 120-170 degrees F) and put the glasses in the oven to keep them sterile and warm (so they won’t burst when i fill them with hot jam.) that’s where they get to rest comfortably while i get to the actual jam-making. :)
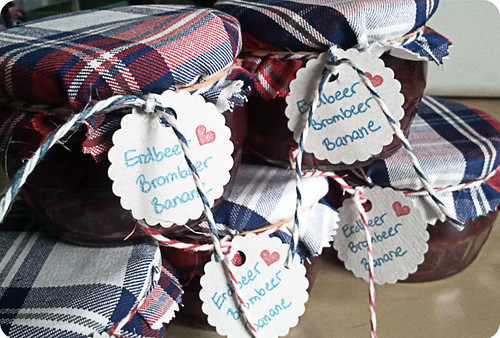
now, for my first try i decided to do a little something “different” (but not too fancy) and made strawberry-blackberry-banana jam (with the largest proportion being the strawberries).

i chopped all fruit up and ended up with 1 kg of it, which is exactly what i needed for the amount of canning sugar i bought. i cut the fruit into small pieces, put it in a pot and started blending.

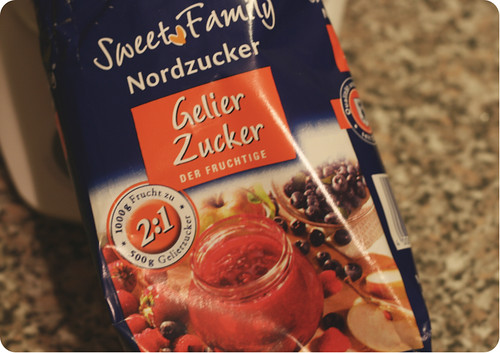
next step would be to add the canning sugar. i like to use canning sugar that’s at least 2:1 (or 3:1) which means i use 2 (or 3) parts fruit + only 1 part sugar. in this case i used the 2:1 kind = 1000 g fruit + 500g canning sugar.
now stir and bring the pureed fruit-sugar-mix to a boil. continue according to the instructions on the canning sugar package.

mine said to boil (while stirring) for about 4 minutes and then ceck, if if the jam would consolidate by putting a small amount on a cold plate. i did that, it got harder quickly so i figured it was done :) i turned off the stove, got the glasses out of the oven, put them on a (warm, damp) kitchen towel, fished the lids out of the water and started pouring the jam into the glasses. when you’re done, close the glasses tightly and place them upside down for about thirty minutes.
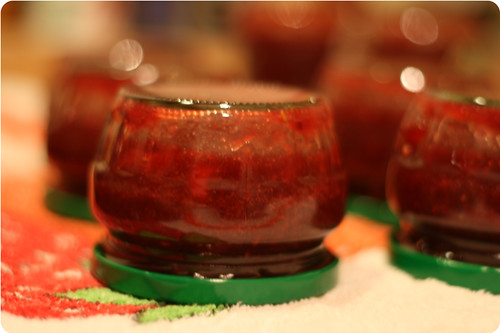
turn them around again and let them cool off (preferrably over night). then get up in the morning all giddy and excited and enjoy a slice of (fresh) bread with butter and your homemade jam. sooooo good.
optional: i actually made small labels for the jam and covered a few of the glasses with some cute fabric to give away to friends. isn’t this the cutest little surprise gift ever?
i hope you enjoyed my little DIY and it’d be great to hear some time if you tried it yourself and how you liked your homemade jam.
xoxo,
kim


Elly
August 16, 2011 at 4:08 amMaking jam is so much fun! Homemade is definitely better than store bought! :)